English
 Arabic
 Danish
 Dutch
Dutch
 Finnish
 French
 German
 Hebrew
 Italian
 Japanese
 Norwegian
 Polish
 Portuguese
 Spanish
 Swedish
 Russian
How to Create a Natural Shadow in Photoshop - The Best Way
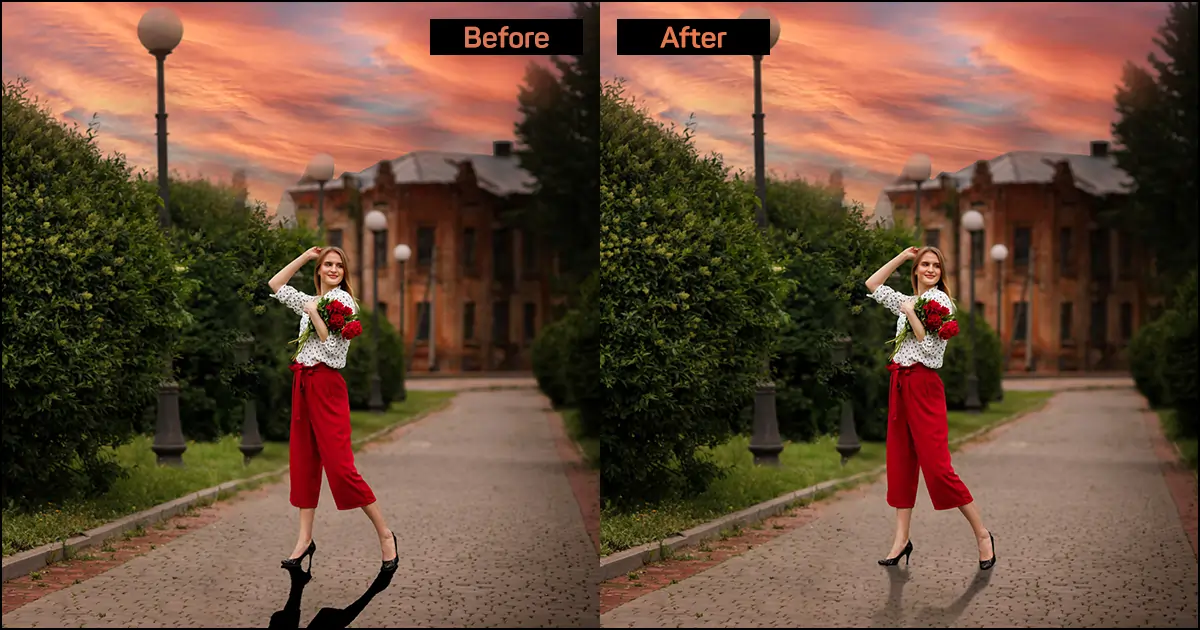
Natural shadow provide realism and depth in images. However, capturing a realistic shadow while photographing is quite difficult and tricky. This is why every photographer needs to add or enhance the shadow quality in post-production. So, if you are here to learn how to create a natural shadow in Photoshop, I will show you from scratch in this Photoshop tutorial. Let's see the easiest steps to creating realistic shadows in Photoshop.
How to Create a Natural Shadow in Photoshop in 6 Steps
Creating realistic shadows is tricky but the steps are super easy if you follow them accordingly. Do what I do step-by-step.
Go to Layers Panel
Take the image in Photoshop. Duplicate the image layer with a keyboard shortcut Ctrl/Cmd + J to keep the original file safe. Create shadows on the duplicated layer.
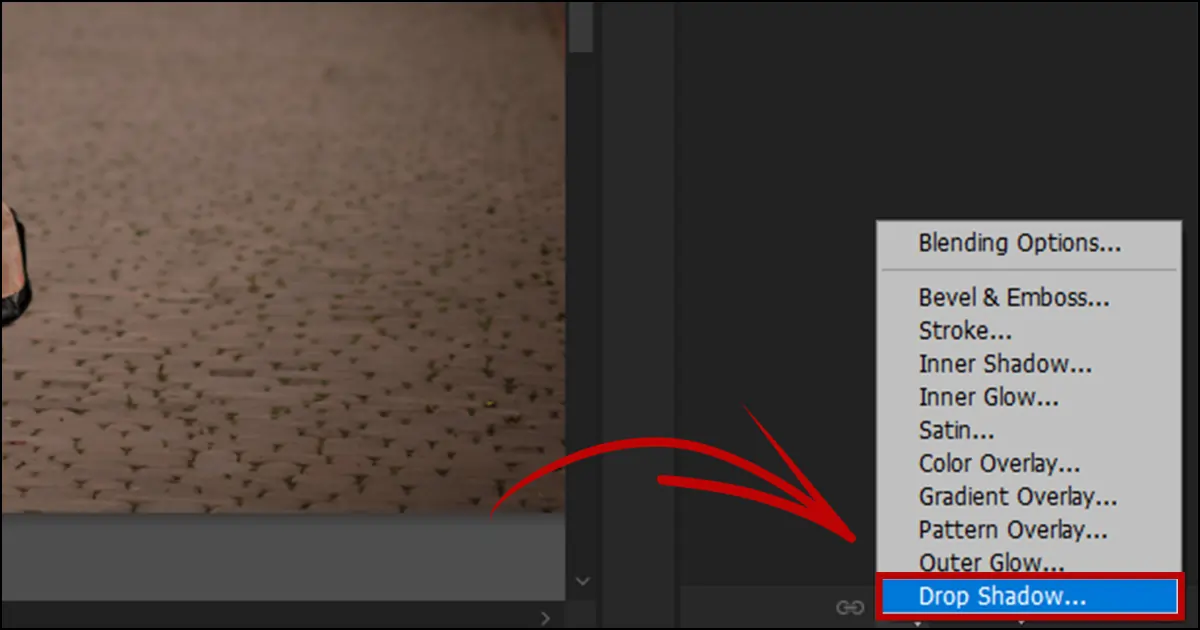
Go to the layers panel and click on the add a new layer style icon (at the bottom of the right side). Add a drop shadow.
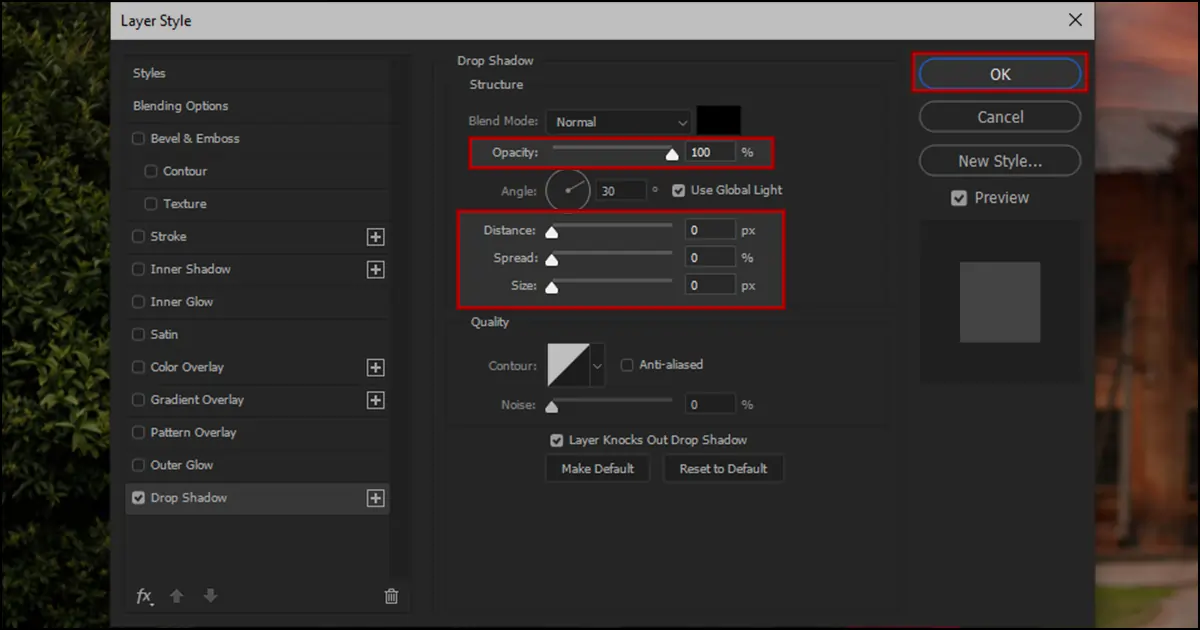
A dialog box will appear. Keep the opacity to 100%, and distance, spread, and size to 0%. Click OK.
Let’s Create a Shadow
Go to the drop shadow layer you are working on. Right-click on the effects and select “Create layer”. A box with “Some aspects of the effects cannot be reproduced with layers” will appear. Click OK.
Hide the original layer by turning off the eye button and you will be able to see the shadow you have created.
Position The Shadow
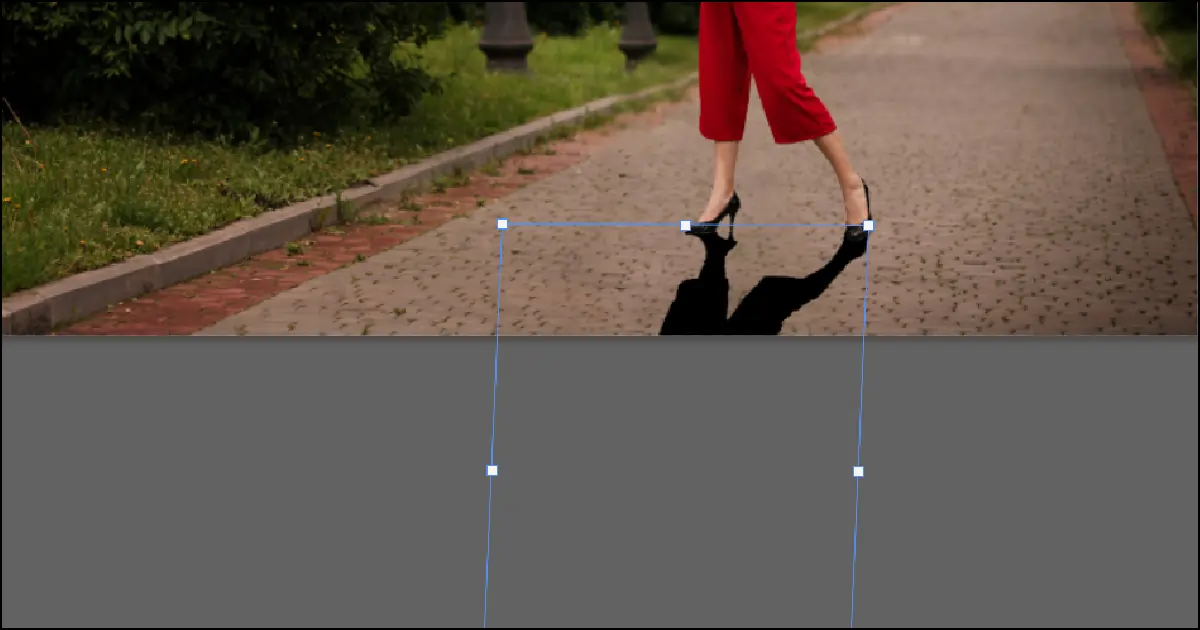
Select the drop shadow layer. Press Ctrl/Cmd + T to Free Transform. A square box will surround the subject. Right-click anywhere inside the box and choose “Flip Vertical”. Now, Drag it down and match the shadow with the subject feet or bottom as much as possible to make it look realistic.
We are still at the initial stage of creating realistic shadows. This is why it is looking too sharp and dark. With further steps, the shadow will become softer and stunningly realistic like it was there naturally.
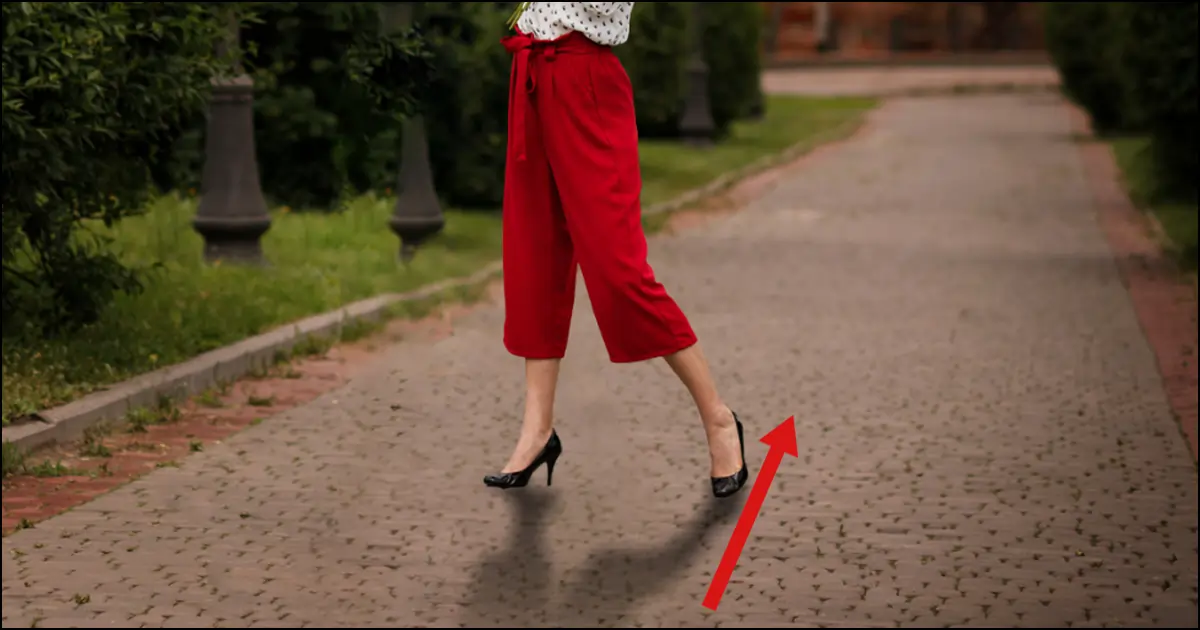
Adjust the Shadow According to The Light Sources
Regardless of natural light or studio light, the shadow is created in the direction the light has fallen. Thus, you need to keep the light direction in mind while setting the shadow. Zoom in on the shadow and see where the light is falling and which areas are dark and faded. Adjust the shadow following the straight line.
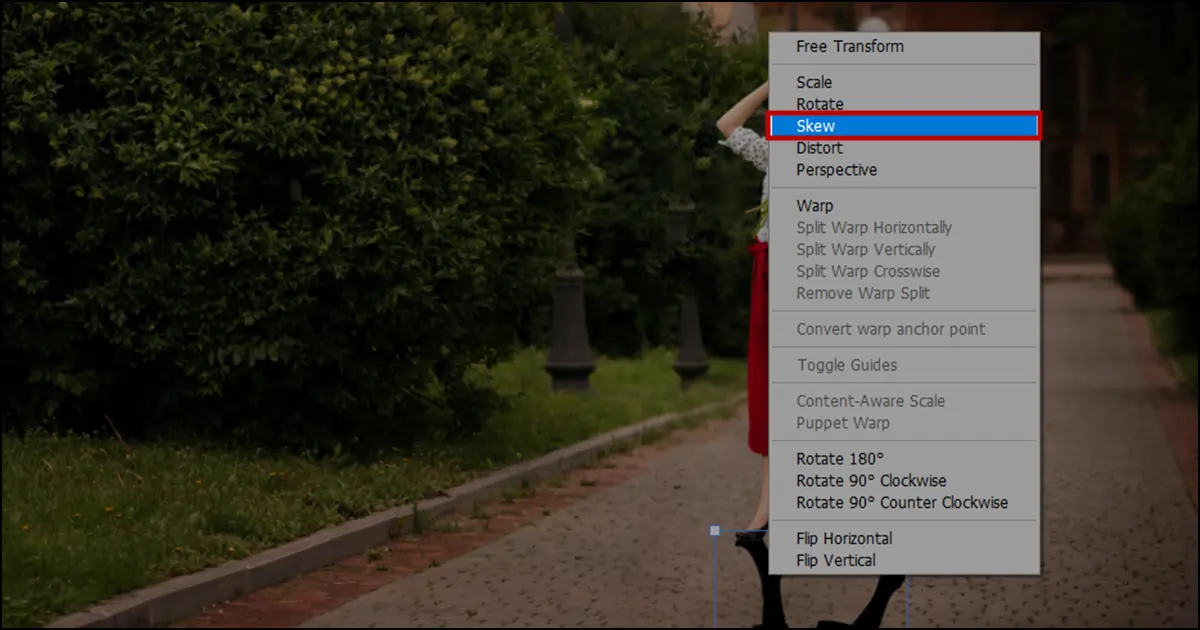
If your free transform has turned off, again Press Ctrl/Cmd + T. If not, just right-click on the shadow and choose “Skew”. Now, skew the shadow across so that it matches the lighting angle.
Right-click on the shadow again and choose “Scale” this time. It will help you drag the shadow down to make it more realistic to the scenario. Drag it till looks natural, position it, and click OK.
Make the Shadows Softer
It is time to soften the shadows from dark to faded. Select the shadow layer from the layers panel. Go to Menubar and choose Filter >Blur Gallary > Field blur. A round icon like a wheel will appear. It is called blur. With this, you can increase and decrease the blur. Drag the icon over the shadow and increase the blur. It will make the shadow look softer.
However, if the shadow near the subject looks soft, you need to make it sharp and a little darker. So, Click on the edges to bring out another blur icon. Drag it toward the edges. Press and hold Ctrl/Cmd + Double left-click on the icon to take the blur to zero. Do not keep the blur to zero or it will look unrealistic and too sharp. Increase the blur till it looks a little dark and matches well with the full shadow. Click OK.
Increase Fadeness
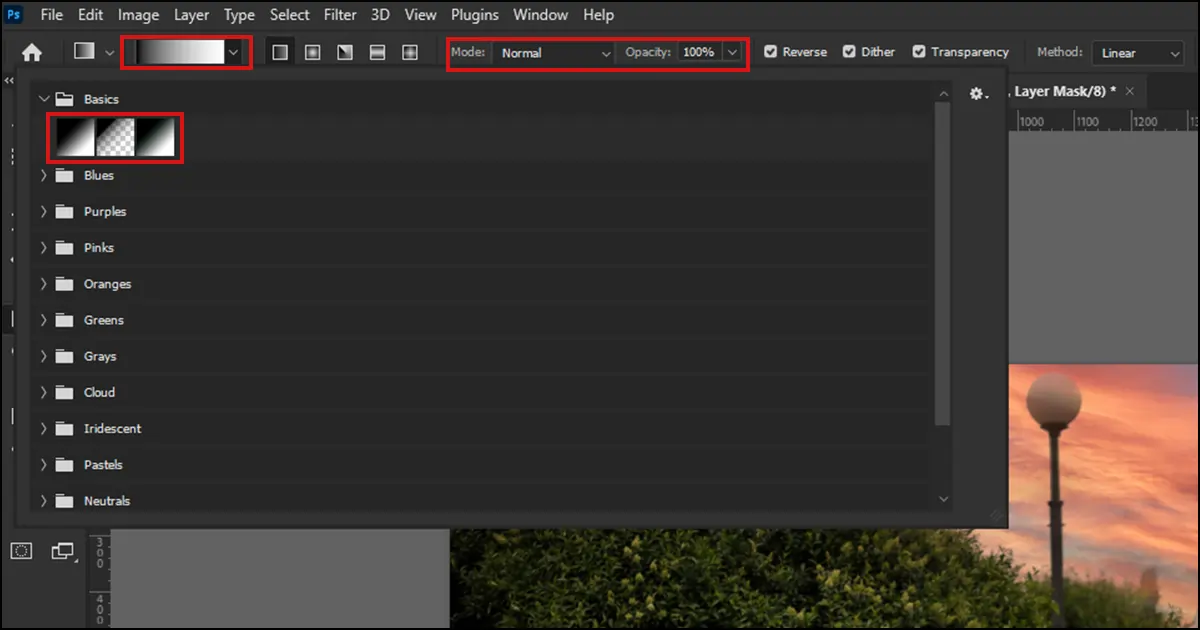
After softening the shadow, you need to increase the fade to enhance realism. Add a layer mask. Set the foreground color to white and the background color to black from the Toolbar’s color picker. Choose the gradient tool from the toolbar.
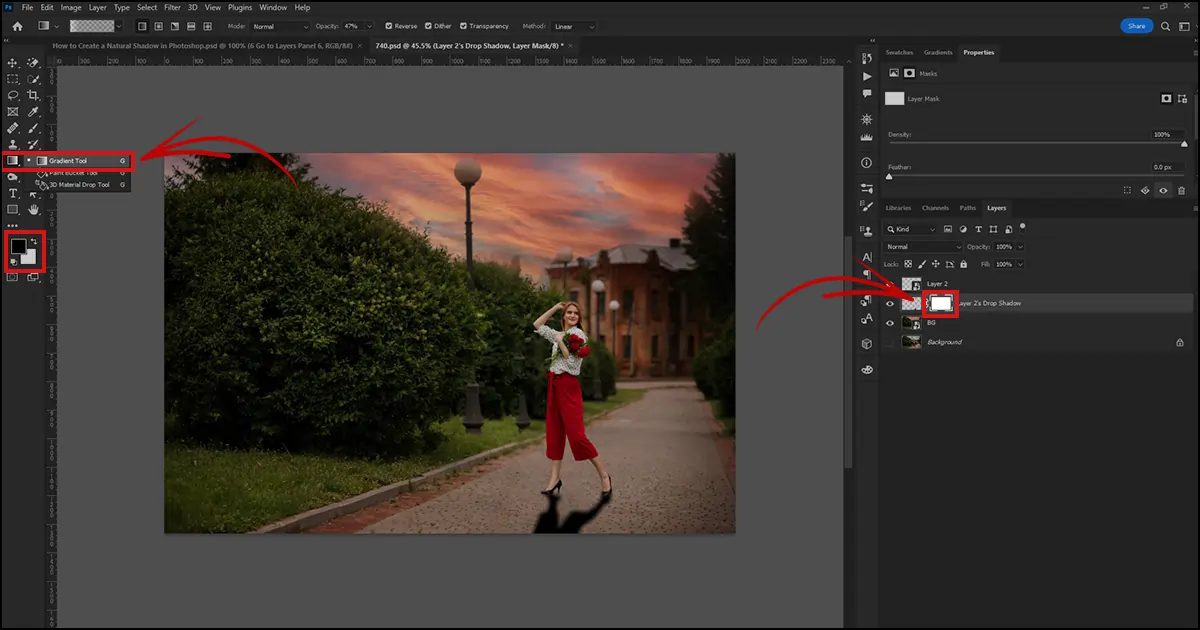
Now, go to the Tool Options Bar and select the gradient color to black and white or foreground and background. Choose linear. Keep the Mode: Normal and Opacity: 100%.
Now, go to the shadow. Drag from off the screen toward the subject and get a nice fade away.
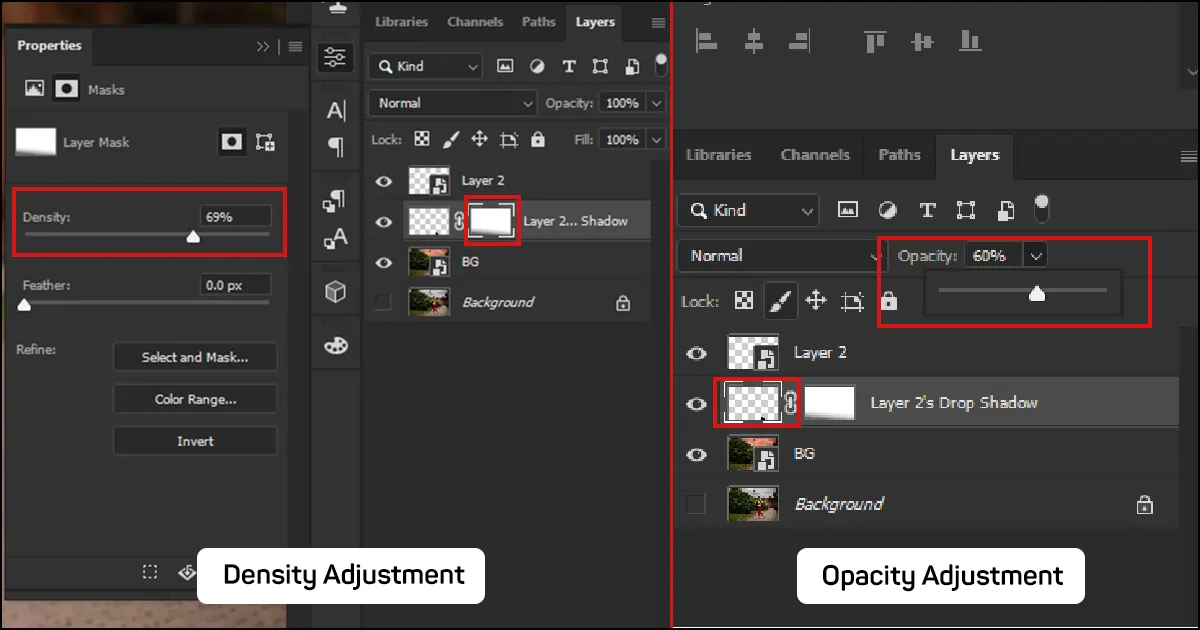
If you think the shadow is still looking strong. Follow the next step to smoothen it out. Click on the layer mask with the properties panel open. Adust density till you like it. Then, click on the shadow layer beside the layer mask and adjust the opacity by decreasing it a little. Lastly, adjust both opacity and density to create the most realistic shadow. When you are happy with your product photo retouching, save it.
Finishing With
Though creating natural shadows is tricky, realistic shadows elevate the professional beauty retouched image quality. As a result, learning how to create a natural shadow in Photoshop is super beneficial for creating amazing brand images.
You can make various natural shadows like reflection, drop, cast away, and more. If you are new to making natural shadows, you can Google the type of images you are editing and get ideas on how the shadows fall based on lighting sources, angle, background, and more. With practice and patience, you will be able to master the beauty of creating realistic shadows in no time.
Lastly, if you need expert help to add natural shadow in Photoshop for your brand images, Contact our Perfect Retouching company. Our retouched images are top-notch and high-quality. We ensure every image is delivered after professional QC. We are 24/7 here to answer to your queries, ensuring you get your images within the deadline. Take our free trial today and check the image quality yourself! For now, Adios!