English
 Arabic
 Danish
 Dutch
Dutch
 Finnish
 French
 German
 Hebrew
 Italian
 Japanese
 Norwegian
 Polish
 Portuguese
 Spanish
 Swedish
 Russian
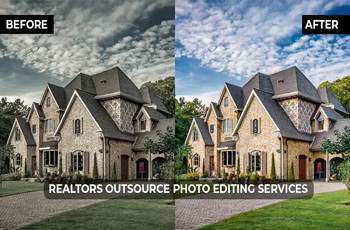
How to Remove a Color in Photoshop: 5 Minutes Read and Apply

Often it happens, photographers try different colors to highlight the subject, resulting in unwanted and eye-soring colors in the final image. However, some amazing tools in Adobe Photoshop can remove color without damaging the image quality. Since you are here, I assume there’s a color you want to remove. Continue reading the article to learn how to remove a color in Photoshop from the background and any specific area with 2 simple and amazing methods, you can remember and utilize quickly. Without further ado, let's start!
2 Ways on How to Remove a Color in Photoshop
Let’s see how to remove a background color with the Color Range Tool and a specific color with the Magic Wand tool. It is super easy.
1st Method: Background Color Removal
Using the Color Range Tool, you can remove solid background colors the best. However, this method is also applicable for removing light backgrounds like white, gray, and more. Just follow these 4 steps.
Step 1: Take the image in Photoshop. To keep the original image unharmed and edit with ease, duplicate the layer from the layer’s panel or the keyboard shortcut - Ctrl/Cmd+J. A duplicated layer is created.
Step 2: Go to Menubar > Select > Color Range. The Color Range Box will Pop up.
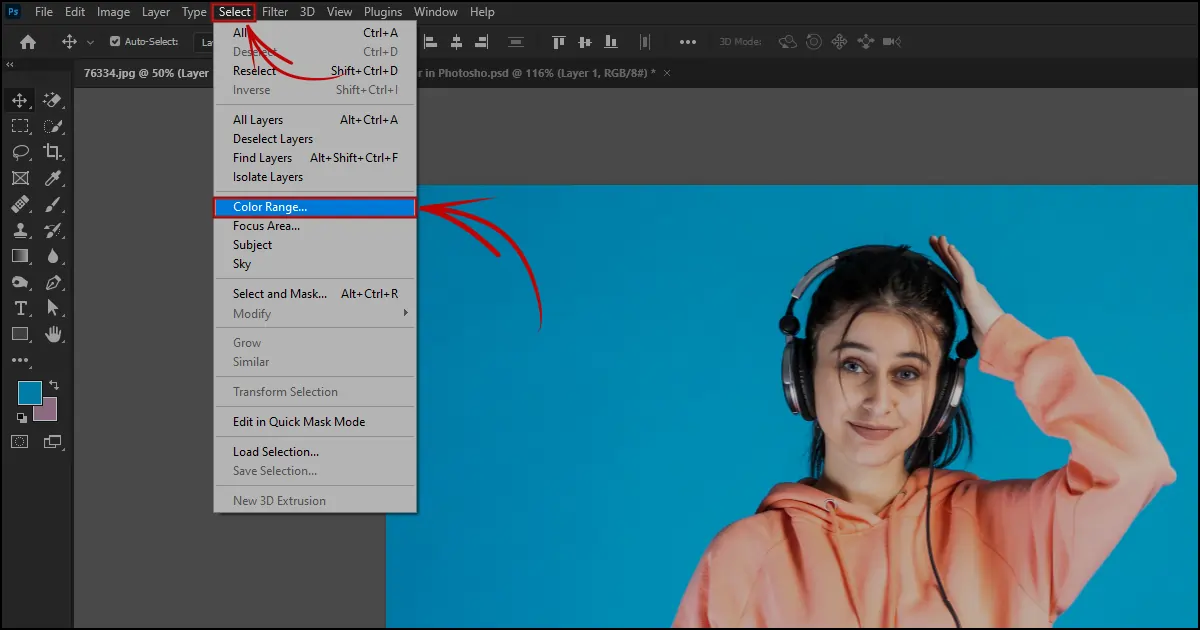
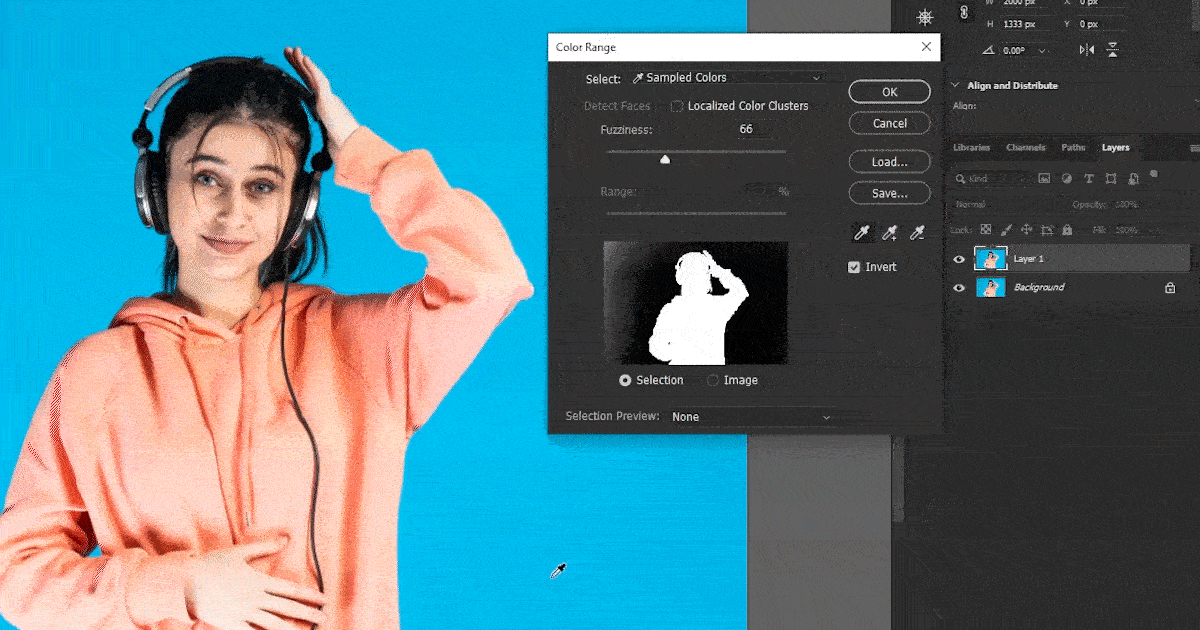
Step 3: The image previewed in the box and Photoshop file are all white and details are hard to see, correct? Let’s fix it. Click on the selection preview below the box and choose “None” from the options. The Photoshop file will turn to normal and you will have an easier time editing the image.
Now, Checkmark “Invert”. Select the Eye-dropper from the color range box and click anywhere on the background color you want to remove. The selected color will turn black on the box. Click on the “Eye-dropper +” icon or hold shift + Left-click to properly select the background. Continue clicking on the image till the whole background gets black/deselected.
When you are done with the selection, again, go to selection preview and select “Grayscale” to turn the Photoshop file to black and white. Zoom in on Photoshop and see if there are any slightly gray areas on the image. If yes, hold shift and left-click on the grey areas till it becomes fully black.
Adjust the fuzziness in the color range box. Increase and decrease it till you find how much fuzziness works for your image. When you find the correct fuzziness number, click OK
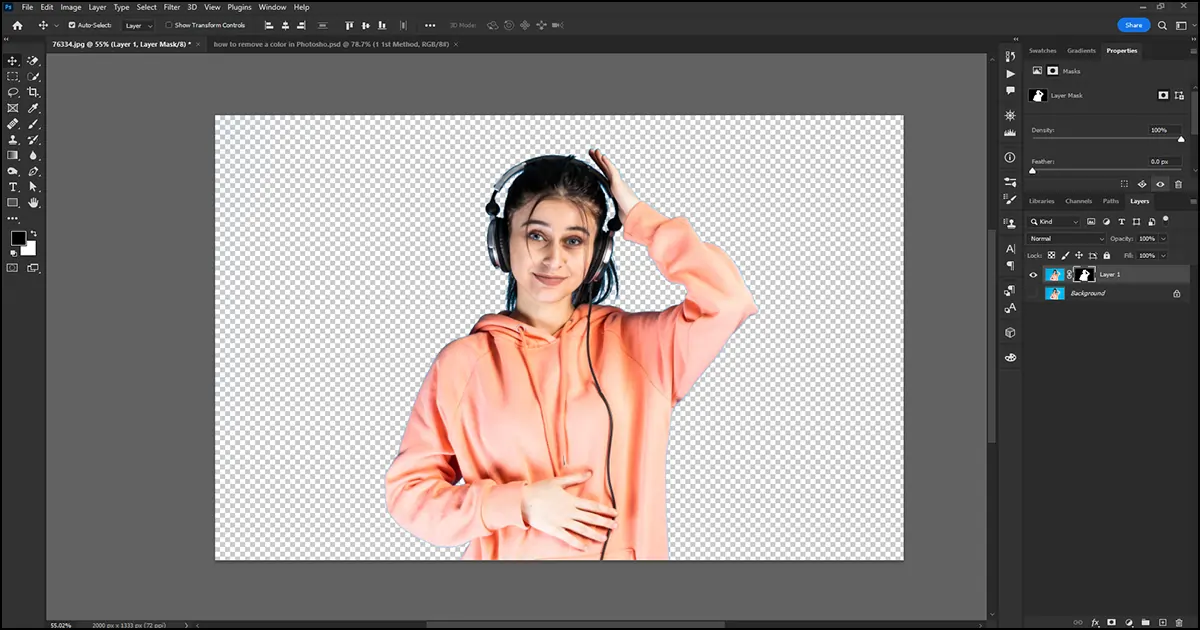
Now, go to the layers panel and hide the background layer by turning off the eye icon beside it. Congratulations! You have successfully removed the background color.
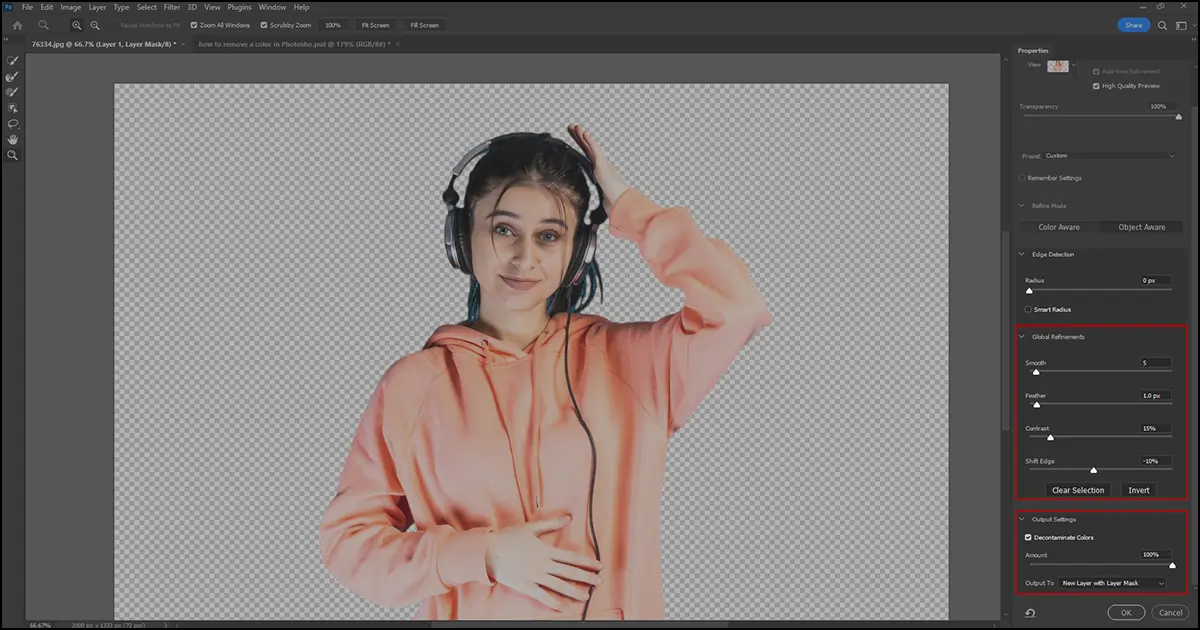
Step 4: Though you have removed the background color, you need to polish the subject by placing it under a dark background. Create a new image layer. Change the foreground color to black or any contrasting dark color to see how the subject looks. If the edits are perfect and there is no frizzing, you are good to go. However, if the edges do not look sharp and have other flaws, follow this method.
Select and left-click on the existing layer mask. The settings will pop up. Smoothen the edges a little like 10% or 15%. Increase feather to 1 pixel. Increase contrast to 10 or 15%. Decrease the shift edge a little about -8 to 10%. Checkmark decontaminate colors. Select output to layer new mask. Click OK and your image will be sharpened and look realistic. Now, you can Photoshop the subject into any background hassle-free. (Note: The setting fixing varies from photo to photo, thus, adjust them accordingly)
Lastly, rename the layer mask and save the flawless image into your file.
2nd Method: Specific Color Removal
While the Color Range Tool is a cool tool for background removal, the Magic Wand Tool can magically remove color from any place. This tool allows you to edit specific colors by selecting pixels from sample colors. Let’s see the process.
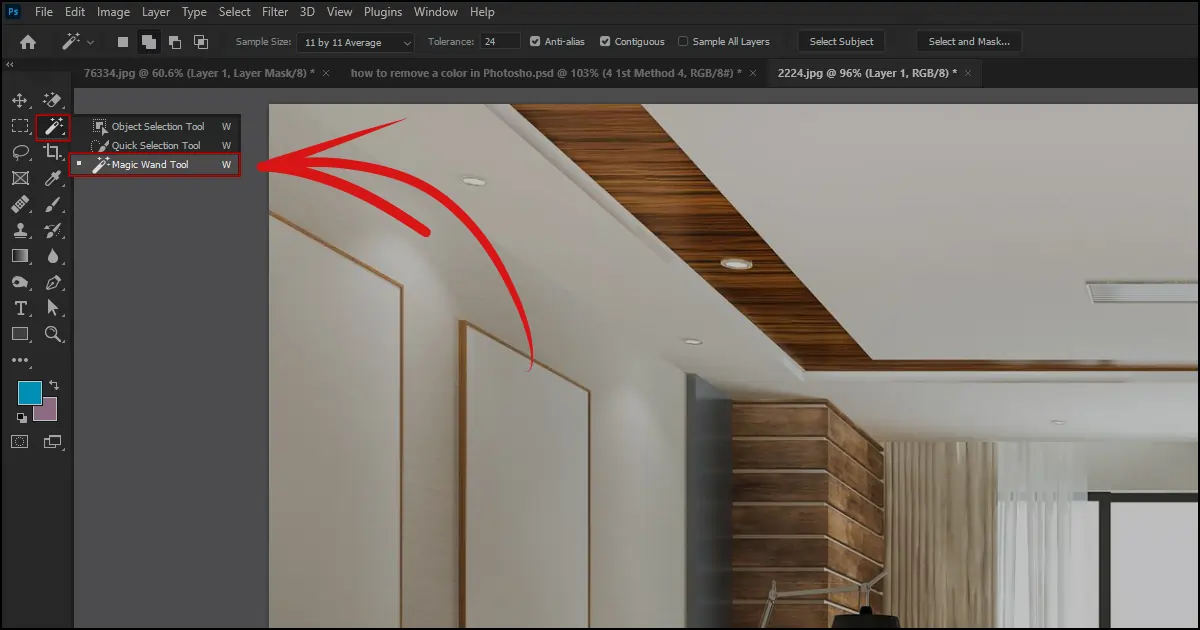
Step 1: Take the image in Photoshop. Duplicate the layer for safety. Work on the duplicated layer.
Now, select the Magic Wand Tool from the toolbar. If you can not find it in the Toolbar, it is usually with the Quick Selection Tool section, or use the keyboard shortcut - W and it will appear.
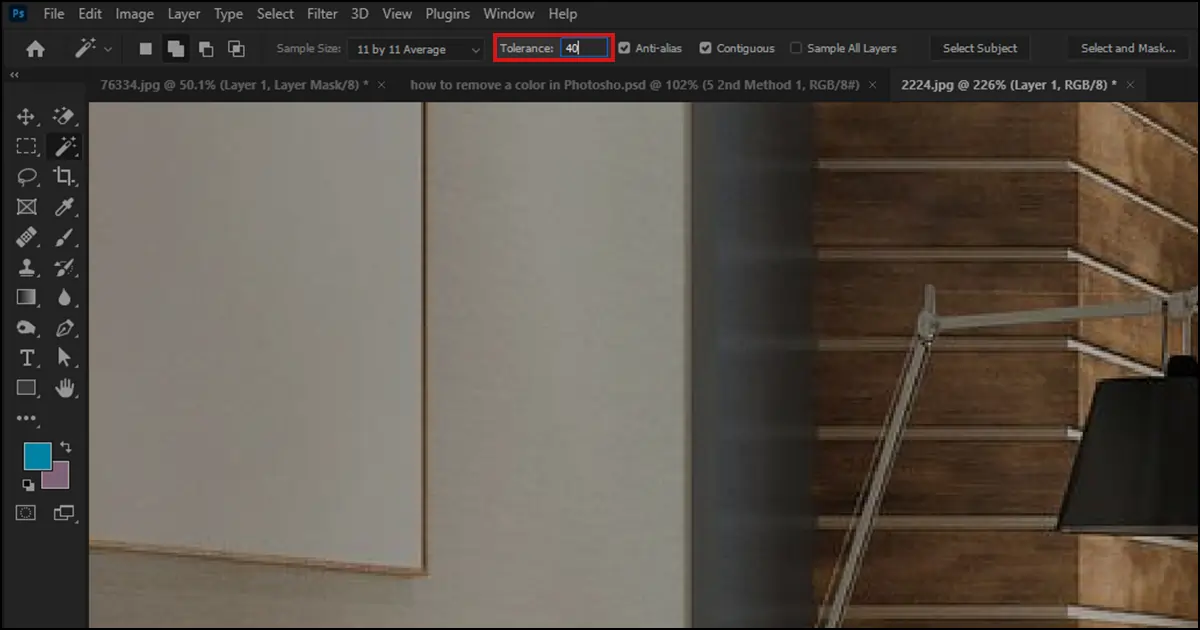
Step 2: Adjust the Tolerance value from the Options bar (right underneath the menubar). The Tolerance range in the Magic Wand Tool indicates how many similar darker and lighter color tones are selected in the area.
Thus, increase and decrease the tolerance from 10 to 40 range till you are happy with the overall selection in the image. For example, we used tolerance 40 to make correct color tone selections in the image.
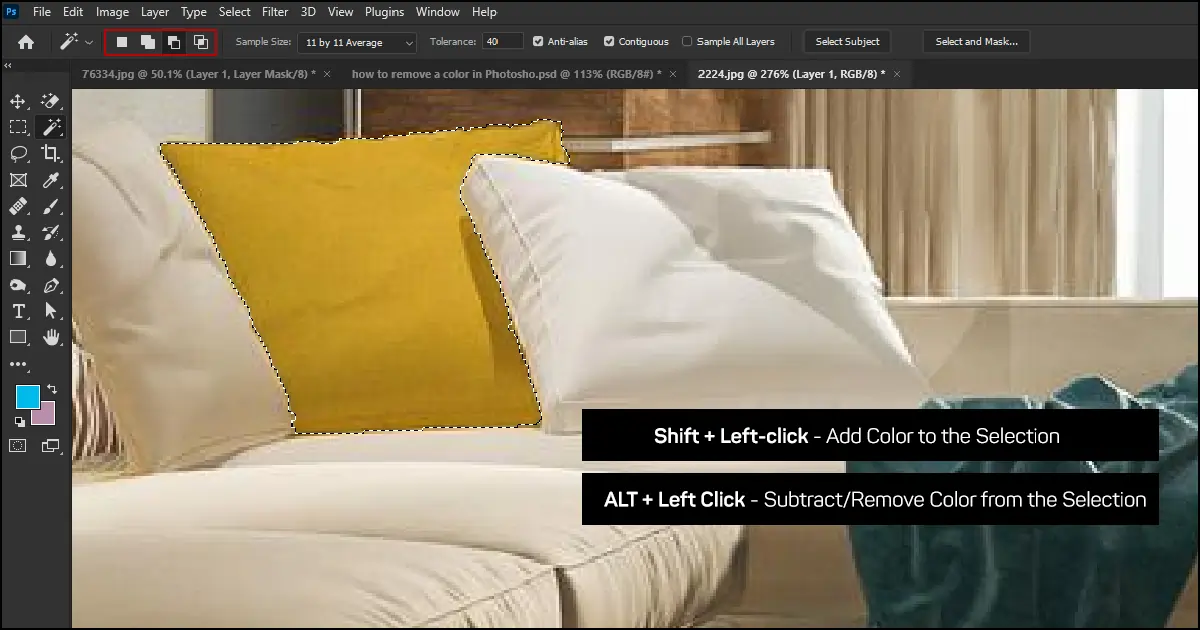
Step 3: Click on the color you want to remove and the Magic Wand Tool will automatically select the similar colors in the image. However, often it is not perfect so you need to refine it.
If you want to add areas in the selection, Hold the Shift key + continue left-clicking on the areas. Hold the ALT key + Continue left-clicking on the area if you want to remove color from the selection.
You can also add or remove color using the Magic Wand Tool’s options bar. Place the cursor on the square icons and you will be able to see which option is for adding and subtracting color.
Step 4: After selecting the areas you want to remove, it is time for the final step.
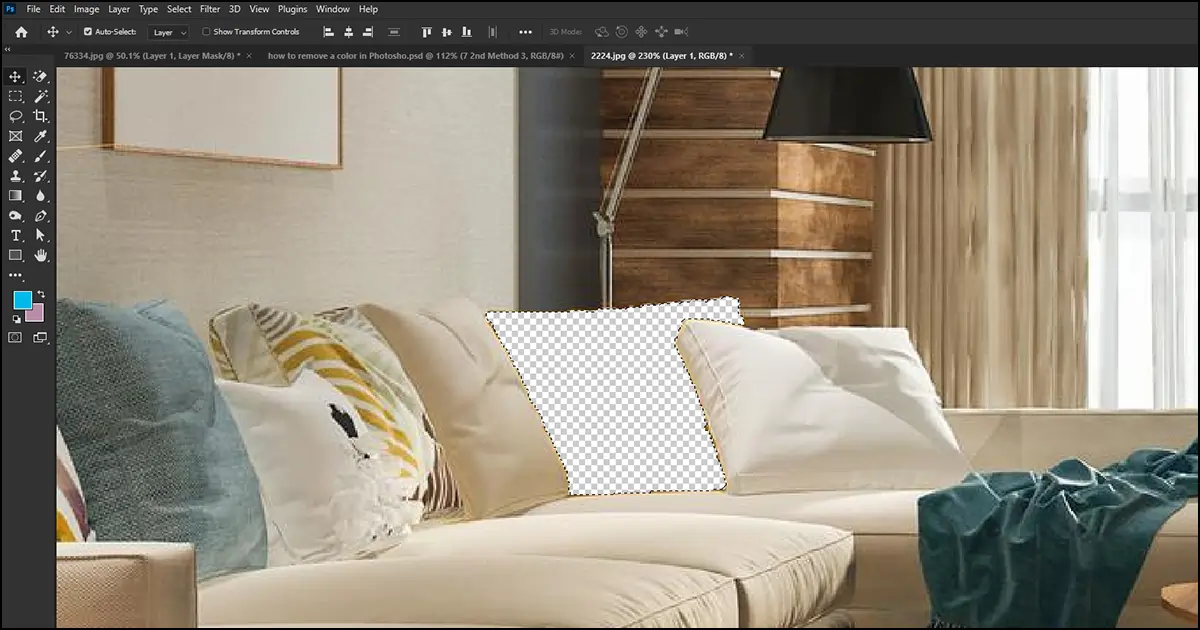
You need to invert the selection to remove color from the image. To invert the selection - Click Ctrl/Cmd + Shift + I. When your selection is inverted, click the "Delete" key from the keyboard and the selected color will be permanently removed.
After permanently removing the selection, you may not be able to edit the selection anymore. So, to make further edits and adjustments to the selection in the future, go to the layers panel and create a new layer mask in the inverted selection image layer. With this, you can safely edit the selection later on.
Wrapping Up
Color Range Tool and Magic Wand Tool is not a popular selection method designers know and use. However, you can use these two methods for logo color removal, product photo editing, jewelry photo background color removal, headshot background removal, or any type of image that needs color removal for enhancement.
These are really cool tools that make selections based on sample colors. Suppose, you want to remove the orange color from the photo and it is scattered in different places. You can make a selection following these two methods from our How to Remove a Color in Photoshop article and remove color at once flawlessly.
That’s all for today. If you need color removal for your brand images or any image retouching, take our professional beauty retouching services. We read and follow instructions thoroughly and deliver the images exactly the way you want within the promised deadline. You do not have to believe my words. Take our free trial and see the results!